Pages

Tampilkan postingan dengan label finally. Tampilkan semua postingan

Jumat, 11 November 2016

Finally got the center support glued down

Last night, I finally got the center support for the rear thwart glued to the keel with thickened epoxy.

The delay was caused by a slight change in course in the way Im trying to straighten out the bend in the plywood seat. I had removed the seat & was prepared to epoxy four 15" reinforcing pieces to the bottom, hoping that would keep the seat "flat." However, the warp seemed minor enough that the only way to keep it flat this way would be to run full-width reinforcing strips. I cant do that, due to the center support.

So, the change in course was to clamp levels to the plywood, to keep it flat. THEN, after trimming the sides to fit, Id attach the side blocking. In theory, once the blocking is in place at that "level," it should force the seat to stay flat once its attached. Thats the theory, anyway.

Center support, finally glued down.

This is my effort to keep the plywood flat until the side blocking is attached.

I used the extraneous epoxy squeezed out from the seat support to fill in imperfections like this in the plywood.

The structural part of the thwart is basic A-C grade exterior plywood from Home Depot. A little tip-of-the-hat to William Jackson here...

Heres where I had marked the sides of the hull for measuring the seat support dimensions.

Im still undecided on whether to install a drain tube, or to just use a bilge pump. If I do install a drain tube, this is where the hole will be drilled.

Read More..

Kamis, 29 September 2016

The Utility Finally a little progress

After being held up by various delays, including a week of unusually harsh winter weather, Ive finally made a little progress. Ive added the first coat of epoxy to encapsulate the stem, as well as the undersides of the breasthook, sheer, and chine at the forward end of the boat.

These surfaces will need 2 additional coats before Im ready to resume planking.

It is possible that my epoxy mixture was not entirely accurate; or that the curing process was slowed by exposure to cold temperatures; or a combination of the two. Whatever the cause, it is taking a considerable amount of time to cure. It is, however, progressively curing. 

This happened to me once before, early-on in my Squirt build. Some epoxy that I applied during rather cold weather remained pliable for a couple of days. It did eventually harden, however. I will know in a couple more days if this batch is going to fully cure or not. I think it will.

The forward end of the boat, all taped up for encapsulation. This is so I wont get epoxy on the surfaces where the planking will attach later.
UPDATE: The epoxy did eventually cure, although it took 2 days. I had mixed and applied the epoxy in low temperatures on the borderline of the 50 degree F limit of the Silvertip slow hardener.
Read More..

Sabtu, 23 Juli 2016

1 seat attached 1 seat coated Primer finally on sheer

Well, the title kinda says it all. So, lets get right to the pictures:


Here is the trimmed rear thwart, waiting for its first "finish" coat of epoxy on top. The plan was to mix some epoxy, coat the thwart using a thin foam roller, squeegee it, then thicken the rest of the epoxy with silica for attaching the forward thwart permanently.

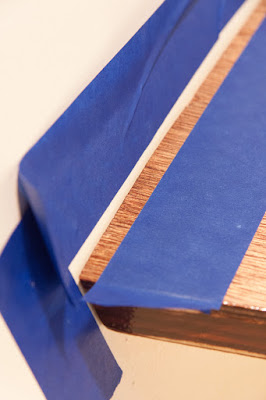
I taped off areas on and around the forward thwart, to both mark where to place thickened epoxy and to make clean-up go more smoothly.

As you can see, there is a considerable gap between the thwart and the side of the hull on the starboard side. The gap is several inches long & gets progressively wider aft. The joint at the forward edge is considerably better. I knew it would take big globs of VERY thick epoxy to fill this gap.

The gap on the port side wasnt so bad.

First epoxy coat rolled & sqeegeed onto the aft thwart.

Heres that big gap filled with thickened epoxy. Before removing the tape, I used the curved corner of the squeegee to shape the epoxy edges.

Improvised bracing to help make sure the thwart was pressed down solidly and level.

Improvised bracing to help make sure the thwart was pressed down solidly and level.

I wanted to get a photo of this filled gap before I painted over it. This is from where I had to remove some material from the corner of the outer sheer lamination in order to get it to bend into place. I removed a little too much, leaving this gap. During installation of the sheer, I heaped on the thickened epoxy in order to fill it. This is the port side joint between the sheer and transom.

First layer of the AquaGard 190 primer on the port sheer.

First layer of the AquaGard 190 primer on the port sheer.

First layer of the AquaGard 190 primer on the port sheer.

Read More..