Pages

Tampilkan postingan dengan label trunk. Tampilkan semua postingan

Rabu, 04 Januari 2017

CB Trunk installed

Finally had a day when I was home for a few hours, and the weather was cooperating.
The centerboard trunk is now glued in place with WEST high strength adhesive, and the trunk rails mounted as well.   I tried to use bronze boat nails, but wound up just clamping.   I still need to glass tab it know place, but that is tomorrows project.   Its officially a sailboat now.


Read More..

Jumat, 23 September 2016

slow progress in the cold Centerboard trunk

Here is the winter update.  I finally had a couple of days off to make some progress.  I cant glue in this weather, but can fabricate parts and dry fit.  Centerboard trunk is under construction and being fitted.  will screw it all together then glue up on a warmer day.


Made a list of a pile of things that can be done in the cold or indoors.  Rudder, mizzen step, fit cross beams, and then wait for a warm day. 


Dec. 28, 2013
Not quite as cold in the garage today, and found my 5/4 dimensional mahogany at the local lumber yard that will serve as the inboard rail for the CB trunk.  I have notched the riser at the bulkhead using the multi-tool and a Japanese hand saw, and temporarily screwed it even with the seat tops with a temporary cleat aft.
notch at forward bulkhead

temporary cleat to hold in vertical space.  

Rail from above.  


Rather than ripping into a $100 sheet of marine ply, I purchased a sheet of Masonite to do a template from.  This worked quite well and the curve of the trunk matched the hull perfectly.  Next is to transfer the lines to the original sheet of ply. I will cut a little tall, just in case.  

Masonite template from above.
Homosote template a tad shy at the top,  will transfer this to the real panel.
Bottom fits the curvature perfectly.

December 29th - All parts fabricated.
Finally got all the parts for the centerboard trunk fabricated and fitted.  Will glue up on a warm day.  
But first,  a stupid idea that saves a lot of time.  I had been sharpening my pencils with a knife, rasp, or whatever i happened to have in my pocket.  It finally dawned on me several boats later that the pencil sharpener in the basement had not been used in many, many, years so I removed it and put it in the garage.  No excuses for poor lines now.  


The next time saver was to place the essential tools close at hand in the boat storage lockers. Obvious, but not at the time I needed to recognize this fact.  

Step 1 - fit the port side of the trunk, cut a little tall and long.  
The board on top is from my Michalak rowing skiff, I know it is relatively flat and spans the gap from side to side nicely.  The port panel was marked, trimmed, then planed with a block plane until level.  

Next was the king posts.  the forward post has multiple bevels, but easy to mark in three directions prior to sawing.  The fit was pretty good, but I sanded it a little to get as much in contact with the bottom as possible. Epoxy grout will hold it in place along with fiberglass tabbing.  Panels will be screwed and glued to it.  

Sheet rock screws have taken the place of the clamp for now.  

Add caption
The aft king post is now installed.  There is a compound bevel, but it is not extreme.  
Starting to look like a centerboard trunk.


Starboard panel was fitted:
  • use masonite template to set curve on bottom.
  • transfer to plywood
  • mark from plans, note discrepancies.
  • cut curve, but leave panel long and tall.  
  • fit curve to boat via scribing with a pencil riding on a block of wood. 
  • recut to be exact.  
  • fit to boat.  


  • Starboard rail is fit. It has been left long on purpose to aid in setting the top of the rails and panels level with the seats. 
  • port panel is scribed to rail to be level.
  • case is removed from boat for trimming, sanding, and final shaping. 

Final photo.  Ready to fiberglass the inside of the board and cut the slot.


The seat is actually in the correct approximate location and it is level!


Read More..

Kamis, 28 April 2016

CB Trunk and CB installation pivot

Board pivot.


Taking it a step further today.  Found a chunk of 3/8 bronze rod and cut it to length for the pivot.  Previously, I had marked the inside of the interior trunk side for the pivot point prior to cutting out.  THIS IS IMPORTANT as it helps locate the pivot point indicated on the plans.  This can be done after the fact, but it was very easy to locate this way.

I removed the starboard side of the trunk and then drilled a 3/8 hole through the CB and the side after ensuring that the holes were lined up well.  These will be drilled oversize, filled with epoxy, then redrilled when all is said and done with.  This will provide a more permanent pivot, and one that wont swell up and contract with the variance in humidity.  good practice on any hole through plywood. as it also protects the interior layers from delamination.

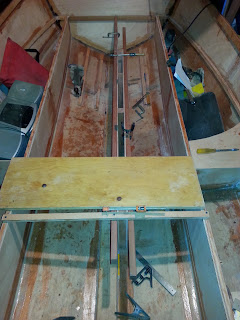
Next, the bronze rod was placed to keep the board and side aligned and a hole was drilled upwards to the starboard panel that is temporarily tacked in place (sheet rock screws).

I then tested the board for pivoting, and marked its maximum extension.  Note: I had been wondering if the board went to vertical, and the answer is, "no".  the board is at a small angle to the hull in the full extended position as it is indicated on the plans.  The picture on the plans matches what it looks like in real life.  The top of the board does not protrude past the top of the trunk, and with the cap on, the travel of the board is limited to this angle.


After assembly, I did notice that the very top front corner of the board still needs shaping to the foil, as it is currently a flat non-hydrodynamic shape.  this will easily be rectified with the wood eraser.  

The pin itself will reside in two layers each side o 3/8 ply.  the first layer will have a hole in it to receive the pin, the second layer is the seal.  I plan to bed it in polysulfide sealant.  This sealant is actually removable in case we ever need to take out the board for maintenance.  

finally, a look at my choice for the tip of the blade.  This may be pared down knowing that we have more of an angle than I anticipated.  The trailing edge and leading edge need to be extended a little more.  This would be most problematic when the board is partially raised (normal downwind practice).  Very little protrudes past the bottom in practice, but it is bothering me. 

I got tired of running out to the garage to find the electric/18V drill, and switched over the the bit brace.  I actually can remove the screws, and then torque them just right in less time than running the drill.  Insert photo of me slapping my forhead and saying "Doh!"

3/15/14 -  update
got the sides of the CB trunk glassed today with a layer of 10 oz glass set in epoxy, and cut out the support pieces for the CB pivot (3/8" 4X4 panels, four of them).  Additionally, further shaping of the Centerboard to make the portion where it emerges from the trunk more hydrodynamic.     Photos below.

While I was at it, I cut the slot out from the bottom of the boat.  It was marked prior to removing the mock up from the boat, so it was a simple job with the Japanese backsaw.  10 minutes tops.  

pilot holes drill to help start the saw. 

Pilot holes drilled every foot to help guide the cut.  Really were not necessary.  


Centerboard slot looking forward. 
Centerboard slot from the starboard side.  


Read More..